HOW TO PAINT YOUR FRONT DOOR
The colour of your front door is a big decision for most homeowners. The colour and type of paint you choose can really set the scene and influence the impression people have when they arrive. And while painting your front door is something you can do relatively simply, it’s important that you follow some basic guidelines, factoring in the material your door is made of to ensure you get the best possible result. Download Front Door Colour Guide [Free Colour Chart]
Here’s how you paint your front door.
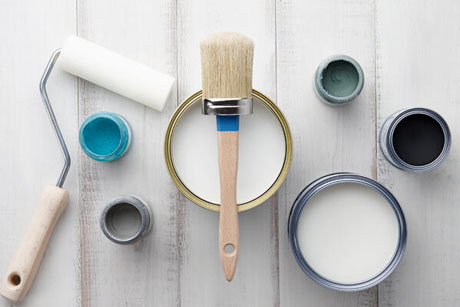
Choose the right paint
The material your door is made out of is an important consideration when it comes to choosing the type of primer and paint you’re going to use.
Doors can be built using wood, metal or composite fibreglass and different paints are better suited to each of the different styles. There are a variety of oil and water-based enamel paints that will suit your timber door, oil-based or alkyd resin based primers are best for dark timbers and ones with high tannins. Oil-based paints are often better at preventing rust on metal doors. If you have a composite fibreglass door, ensure your primer has ‘fibreglass’ included in the suitable surfaces or that it is an etching primer and select an applicable solvent-based or acrylic enamel designed for exterior exposure for best results. If in doubt, ask the experts – the right paint can mean the difference between a great result and an average one.
Once you’ve selected your primer and topcoat paint, it’s time to get started! Here are the steps you need to follow to ensure a perfect finish when painting your front door.

1. Remove your door and get it ready
You may think that taking your door off the doorframe isn’t necessary, but trust us, it will make the process of painting your door a whole lot easier. Simply remove everything attached to the door such as the doorknob, knocker, hinges etc, remove from the frame and place on a flat, horizontal surface, ready to paint. Give it a gentle sanding before you start if needed and then dust it off thoroughly before you begin.
2. Start with an undercoat
An undercoat helps to seal the door and smooth out any imperfections so don’t skip this step. Give your primer a good stir and then apply to the door, beginning at the edges. Fill a paint tray and, using a roller, apply the paint evenly to the door in a W formation, making sure you’re covered it evenly. Leave it to dry completely before continuing – this may take a few hours.

3. Apply your topcoats
Once your undercoat has dried, you can get down to business applying your topcoat. Apply at least two coats, again, making sure to do so evenly, watching out for drips, and leave ample time for the first coat to try before applying the second.
4. Dry and replace
Once you’re happy with the finish of your door and it’s completely dry, you can replace the hardware you’ve removed and re-attach it to the door frame. Welcome home!